Nothing says "I love you" more than a homemade gift. Am I right? Money can buy you most things in life, but when it comes to your mom or any special person in your life, sometimes you really can't go wrong with a little DIY.
With Mothers Day this weekend, we thought we would share some of our favorite ideas to spread a little love and make your momma smile.
1. The Infamous "Coffee Mug"
Now this is ALWAYS a go to winner in my book. With stores like TJ Maxx, Marshalls and Ross, coffee mugs are endless, but being able to make something unique is truly special and your mom will definitely appreciate it!


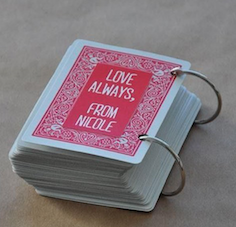
2. Little Book Of Love
Simple and Easy. This is definitely a "little" (no pun intended) way to let your mom or special lady know you care. Take some time and write 52 (or less) things that you truly love about your mom and what makes her special.


3. DIY Sugar Scrub
Time to keep your lovely mom smelling fresh (or at least having soft hands). Because coconut oil is so good for you and vanilla is one of my personal favorites, here is the recipe for how to make a delicious coconut vanilla sugar scrub. It's so easy too!


Ingredients:
- 1/2 cup Coconut Oil
- 1 cup White Sugar
- 10 drops Vanilla Essential Oil
- Half pint mason jars
Directions:
- Place 1/2 cup coconut oil into a microwave safe dish, and microwave for about 30- 45 seconds, or until completely melted.
- Transfer melted Coconut Oil to small mixing bowl, and stir in 1 cup of White Sugar. Mix well.
- Add 10 drops of vanilla essential oil (or more for a stronger scent), and mix again until well combined.
- Transfer to Mason Jar, and you’re done! Woo!
4. Cupcake Bouquet
Don't buy a bouquet, make it! Cupcake bouquets are easy to make and wonderful to receive as gifts. Not only do you get to eat the cupcakes after, but you can have a pot left over for real flowers and plants! Definitely a must have.
Ingredients / Items Needed:
- 12 to 14 cupcakes
- Buttercream frosting
- Red food coloring
- Disposable piping bag or a reusable piping bag
- 5-inch Styrofoam ball
- Flower pot that can hold a 5-inch Styrofoam ball
- Toothpicks
- Green tissue paper
- Clear tape

Directions:
- Take half of the buttercream and, if using, use the red food coloring to color the buttercream pink or red. Keep the other half of the buttercream white.
- Put the buttercream in a pastry bag fitted with a star tip (like Wilton 1M open star tip). If using a pink, red, or other-colored buttercream, place it in a second, separate pastry bag fitted with a second star tip.
- Start in the center of each cupcake and pipe a spiral going outward to the edge of each cupcake to create a rose shape.


- Frost all of the cupcakes, alternating between the white and the colored buttercream from cupcake to cupcake to make a more colorful arrangement.
- Place the frosted cupcakes in the refrigerator for 30 minutes while you prepare the Styrofoam ball, to allow the frosting to firm up.
- Place the Styrofoam ball into the flower pot. Place two toothpicks in each area where you want a cupcake. Around the sides, nearest the flower pot, insert the toothpicks at a 45-degree angle to help keep the cupcakes from falling off.


- Remove the cupcakes from the refrigerator. Slide a cupcake onto each pair of toothpicks, adjusting the toothpicks as needed to place the cupcakes close together. Cover as much of the Styrofoam as you can.
- Cut the green tissue paper into small strips. Pinch the bottom of one of the strips of tissue paper and twist or otherwise bunch the tissue paper to make a “leaf”. Take the bunched piece of tissue paper and stick it to the exposed Styrofoam in between the cupcakes. If desired, place a small piece of clear tape on the pinched part of the tissue paper “leaf” to secure it to the Styrofoam ball.
- Make more tissue paper “leaves” until you fill in all of the gaps between the cupcakes. If you like, use a toothpick to help keep the “leaves” attached to the Styrofoam ball, which – while not absolutely necessary – can help ensure that the leaves do not fall off when moving the bouquet. All done!

As you can see, creating something homemade is always the way to go. Whether you are 5 or 25, your mom will always appreciate that you took the time to make something instead of buy it. Gift cards are great, but this Mother's Day, give her something she will truly remember.
So Happy Mother's Day to all you awesome moms out there! Elle A Events wishes you an amazing weekend! - XOXO